
In order to run the videos properly which I have pointed you to on this site you must install a video codec which is not standard with windows. To do this follow the steps below:
1/ Go to the website www.techsmith.com
2/ In themenu at the top of the web pave click Downloads > Video Codecs.
3/ In the Download center page click on the Download TSCC Codec link.
4/ In the File Warning Dialog click on the "Run" Button.
5/ An Install Dialog will appear, Click Install.
6/ In the TSCC Installation Complete dialog, click Ok. (this last step. does not take long so don't worry it has actually done something)
Thursday, November 01, 2007


Sunday, October 28, 2007
Some 3ds max Videos
A couple of new videos which I have created today on 3ds max.
For those who are new to 3ds max a short explaination of the Modifier Stack
http://www.mediafire.com/?0hc4p5dzi4m
I also created a short example that shows how the Modifier Stack and cloning objects using instances and references can create a building model which can be modified using some basic parameters.
http://www.mediafire.com/?cidd29klbg9
Hope you like the videos.
cheers
rec.
For those who are new to 3ds max a short explaination of the Modifier Stack
http://www.mediafire.com/?0hc4p5dzi4m
I also created a short example that shows how the Modifier Stack and cloning objects using instances and references can create a building model which can be modified using some basic parameters.
http://www.mediafire.com/?cidd29klbg9
Hope you like the videos.
cheers
rec.
Thursday, October 18, 2007
Revit to 3ds max Video Files
A few weeks ago I presented a seminar at the Arcadia conference which was held in Halifax, Nova Scotia. I presented how Architects could work with Revit files to create renderings in 3ds max. I promised my attendees that I would post some screen videos of the materials which were not in the content I distributed.
Although, I have not been able to do as much as I wanted. I thought it would be best to get at least something here online for people to download, and then do some more as time permits. The following 2 videos describes the process of exporting Revit files to AutoCAD format and then Linking an AutoCAD file in 3ds max. there are a couple of flaws in the presentation but again I wanted to post something sooner rather than later.
The following URLs will download the files:
You might also be interested in the material which I used in my Revit to 3ds max presentation. It was developed by a friend of mine at Autodesk, Amer Yassine and a collegue James Bartlett. Go to the following link and scroll down to the area entitled Visualization Curriculum.
http://usa.autodesk.com/adsk/servlet/index?siteID=123112&id=8029689&linkID=9243097
Hope you all enjoy this material.
cheers
Roger C.
Although, I have not been able to do as much as I wanted. I thought it would be best to get at least something here online for people to download, and then do some more as time permits. The following 2 videos describes the process of exporting Revit files to AutoCAD format and then Linking an AutoCAD file in 3ds max. there are a couple of flaws in the presentation but again I wanted to post something sooner rather than later.
The following URLs will download the files:
http://www.mediafire.com/?7lgzxfpxzdx
http://www.mediafire.com/?2k25u1nydx2
You might also be interested in the material which I used in my Revit to 3ds max presentation. It was developed by a friend of mine at Autodesk, Amer Yassine and a collegue James Bartlett. Go to the following link and scroll down to the area entitled Visualization Curriculum.
http://usa.autodesk.com/adsk/servlet/index?siteID=123112&id=8029689&linkID=9243097
Hope you all enjoy this material.
cheers
Roger C.
Tuesday, August 28, 2007
Realistic Architectural Visualization - Reprint and Corrections
Good news and bad news.


Good news is the Realistic Architectural Visualization with 3ds max and mental ray book which I co-authored with Jamie Cardoso has now gone into a second printing. We were able to fix a few things in the book but unfortunately one was too late for the print / reproduction process (The bad news). So I'm posting it here and providing you a downloadable file to replace the exising file.
In Appendix 3, there is a file on the CD which is not referenced in the tutorial but which is provided to give you an idea of what the scene and file should look like once you are finished. Unfortunately, there is something wrong in the file which will give you incorrect results. In the file DOF_FE_Final.max Exposure controls have been turned on. To correct the error you can simply do the following:
- In the Render pull down menu, select Environment.
- In the Environment and Effects Dialog, go to the Exposure control rollout.
- In the Exposure Control type pull down list, change the type to no exposure control.
Now you are ready to render the scene and get the same results as when you go through the tutorial in the book.
If you would simply like to download a corrected file it is contained in a .zip file at the following URL.
Saturday, August 11, 2007
Siggraph 2007
Well another year goes by and anther Siggraph goes into the books. Siggraph always congers up memories for me. Going to a show floor, being inundated by demos, stuffing a bag with product literature. Getting home filled with all these crazy ideas, your head filled up as that product literature bag. Then back to work, the ideas and product literature bag remain untouched.
In the last few years, I've tried to be more conservative to Siggraph. Do what is important, meet a few key people, get a few interesting contacts to follow up on, have a few key conversations rather than hundreds of superficial ones.
This year as in many others gone by, Siggrraph was about evolution. Sometimes we forget, how mature this industry is getting. It's about 16 years that 3D Studio has been on the market now. Well I missed anything revolutionary, but if it was happening it probably was in a back 10x10 booth.
It has been years that I've used Autodesk products, never regretted starting my CG career with AutoCAD, then 3D Studio. Last year I figured that the Alias acquisition would only help Softimage. People would turn to alternatives. Well it looks like I was wrong, It has helped Softimage AND Side Effects (Houdini). Softimage sales are apparently up 40%, The Houdini books were flying off the shelves in the Focal Press booth.
This year, Pia & Ken Maffei were kind enough to invite me to stay with them in their home. On Wednesday and Thursday, Amer Yassine and Michele Bousquet joined us for a pleasant day where we participated in a real 3D expereince. Golf at Redhawk.. My favorite..:-)
In the last few years, I've tried to be more conservative to Siggraph. Do what is important, meet a few key people, get a few interesting contacts to follow up on, have a few key conversations rather than hundreds of superficial ones.
This year as in many others gone by, Siggrraph was about evolution. Sometimes we forget, how mature this industry is getting. It's about 16 years that 3D Studio has been on the market now. Well I missed anything revolutionary, but if it was happening it probably was in a back 10x10 booth.
It has been years that I've used Autodesk products, never regretted starting my CG career with AutoCAD, then 3D Studio. Last year I figured that the Alias acquisition would only help Softimage. People would turn to alternatives. Well it looks like I was wrong, It has helped Softimage AND Side Effects (Houdini). Softimage sales are apparently up 40%, The Houdini books were flying off the shelves in the Focal Press booth.
This year, Pia & Ken Maffei were kind enough to invite me to stay with them in their home. On Wednesday and Thursday, Amer Yassine and Michele Bousquet joined us for a pleasant day where we participated in a real 3D expereince. Golf at Redhawk.. My favorite..:-)
Thursday, July 19, 2007
And.... Another Book... AutoCAD MEP Electrical
All,
Well here I am again, yet again announcing another book. This one is on AutoCAD MEP Electrical 2008. It's an essentials book. It should be out sometime this week. Another one is in the hopper as we speak. AutoCAD Architecture 2008 Advanced....
cheers
rec.
Well here I am again, yet again announcing another book. This one is on AutoCAD MEP Electrical 2008. It's an essentials book. It should be out sometime this week. Another one is in the hopper as we speak. AutoCAD Architecture 2008 Advanced....
cheers
rec.
Tuesday, June 19, 2007
AutoCAD Architecture 2008 Essentials
All,
I've just completed working on a new title for Autodesk, AutoCAD Architecture 2008 Essentials. It should be available for purchase from the Autodesk Website shortly. This is an introductory manual intended to get new users up to speed in a 3 day ATC class. It can used by people learning on their own.
It was co-developed by Autodesk, Kristen Smith, our training production group and myself.
Here is the Table of Contents:
L01 - Using the Interface
L02 - Drawing Management
L03 - Adding and Modifing Walls
L04 - Working with Doors, Windows, and Openings
L05 - Creating and Modifing Spaces
L06 - Working with Schedule Tags and Tables
L07 - Creating Details
L08 - Layers
L09 - Object Display
L10 - Modifying a Design
L11 - Grids and Structure
L12 - Stairs
L13 - Floor Slabs
L14 - Roofs
L15 - Ceiling grids
L16 - Ceiling Fixtures
L17 - Curtain Wall
L18 - Door & Wall Assemblies
L19 - View Drawings
L20 - Callouts
L21 - Annotation
L22 - Sheets
L23 - Plotting
Let me know how you like it.
I've just completed working on a new title for Autodesk, AutoCAD Architecture 2008 Essentials. It should be available for purchase from the Autodesk Website shortly. This is an introductory manual intended to get new users up to speed in a 3 day ATC class. It can used by people learning on their own.
It was co-developed by Autodesk, Kristen Smith, our training production group and myself.
Here is the Table of Contents:
L01 - Using the Interface
L02 - Drawing Management
L03 - Adding and Modifing Walls
L04 - Working with Doors, Windows, and Openings
L05 - Creating and Modifing Spaces
L06 - Working with Schedule Tags and Tables
L07 - Creating Details
L08 - Layers
L09 - Object Display
L10 - Modifying a Design
L11 - Grids and Structure
L12 - Stairs
L13 - Floor Slabs
L14 - Roofs
L15 - Ceiling grids
L16 - Ceiling Fixtures
L17 - Curtain Wall
L18 - Door & Wall Assemblies
L19 - View Drawings
L20 - Callouts
L21 - Annotation
L22 - Sheets
L23 - Plotting
Let me know how you like it.
Tuesday, June 05, 2007
Dimensioning in AutoCAD Architecture 2008
 Well, I have to admit, I am impressed sometimes by small things. Here is something I've discovered recently in AutoCAD Architecture 2008 while working on materials for Autodesk.
AEC Dimensions are really nicely implemented. I used to really hate any kind of automated dimensions, with the exception of Revit. Here though are some really nice useful dimensions. As is illustrated in the first image, first you place a chain of dimensions. As you can see the 2nd and 3rd are the same overall dimension. So the AEC dimension object allows you to add objects, like the interior walls illustrated in the 2nd image.

Now the result gives me 2 problems, one the wall openings chain of dimensions is interrupted by dimensioning the the interior wall partition faces, and second the interior wall dimensions are in the wrong place and really should dimension to the center of the interior partition.

Here is where a variety of grips take over in the AEC Dimension object. One allows you to take one chain and move it, as is illustrated in illustration 3. The others allow you to manipulate the extension lines in the chain, removing extra dimension lines, and allowing you to change the interior partitions dimensions to center (albeit in 2 steps).

So there you go I'm impressed, it's a great improvement. We wrote all about it in the upcoming AutoCAD Architecture 2008 Essentials, and it will be available as an e-learning download to AutoCAD Architecture 2008 subscription customers.
Friday, May 04, 2007
AutoCAD for Architects

Heya,
Well here is the begining of a series of books which I am working on with Autodesk, Kristen Smith, and the Autodesk TCD team. We have called it AutoCAD for Architects. It is a short book containing 6 lessons designed to get you started with AutoCAD Architecture 2008, or what was formerly known as Architectural Desktop (ADT).
One of the premises of this book, was to allow a student to read and use as little of the book as they wanted to and apply this to their use of the software. Say an Architect likes to use the detail tools but likes to lay out their plans with typical AutoCAD commands. They would be able to flip to the details lesson, and do that one.

This book is available now. Check out
http://estore.autodesk.com/dr/sat3/ec_Main.Entry17C?SID=19515&SP=10023&CID=0&PID=917182&PN=1&V1=917182&V2=&V3=&V4=&V5=11033742&CUR=840&DSP=&PGRP=0&ABCODE=&CACHE_ID=0
Tuesday, May 01, 2007
Your 3D Personal Trainer
I would like to introduce you to an idea which is not new. I would like anyone who is considering training in any software application to consider taking training from a personal trainer. You could call this a number of things, a coach, mentor, or one on one training, but essentially it is some form of training that you recieve from a dedicated person for short intervals over a period of time. What's good about recieving personal training? Well plenty of things;
- You can determine the goals of the training and what is being taught.
- If you don't like the trainer, you can "bail" without a great investment of time and money.
- You set the pace.
- You get information right from the source of the information.
Ok, so where do you find these personal trainers? Sometimes you might be lucky to work in a larger company where a mentor or more experienced visualization artist works next to you. But in many situations, you might be completely alone, and find it hard to get someone to help at your location. One of the things that I find most interesting today is using the internet to bring the source of the information and the individual requiring the information together. All the benefits of personal training can now take place using a variety of e-learning tools.
Recently, I provided a training course for a 3D Artist in Texas who used AutoCAD and 3ds max to create visualizations at his architectural and engineering firm. He sent me a few of his renderings which I critiqued, and sent him a plan for a training of 5 sessions of 2 hours each. I'm based in Montreal, so we had a small time difference, some long distance charges to deal with, and we used a Web meeting tool called BeamYourScreen. All in all, it helped this artist who could not find much in the way of training, improve the skills in visualization he wanted to improve at a reasonable cost.
Friday, April 20, 2007
The Books keep Rolling Out
 Just when one book gets done and is introduced, here comes another. This one was the fruit of working with Autodesk over the last 5 months on a product which I am a bit less familiar with. The book Autodesk Architecture 2008 - AutoCAD for Architects is now available, you will probably be able to find in on the Autodesk e-store in a couple of days (maybe a bit of wishful thinking).... I'll get images up here when I get my own copy.
This is a short book, and is meant to get people started with ACA (AutoCAD Achitecture). Covers the UI, the Project Manager, Walls, Doors & Windows, Spaces, Schedules and Detail creation. Kristen Smith, an ADT specialist was the technical expert who contributed her knowledge and a interesting building design to the courseware.
I hope you can get a copy and enjoy. If you are under subscription with Autodesk for ADT and ACA, the there is an e-learning course which covers everything extept Spaces and Schedules.
Thursday, April 12, 2007
Arch VIZ book printed and should be available soon!

Well here it is a final hard copy of the book both Jamie and I have worked on since last May. It is looking really great. Full color, lots of illustrations.

Here is a sample of the interior pages of the book. I'll post some high res photos of the inside of the book for you to see, shortly.
Thursday, April 05, 2007
New Book Coming out soon
It finally happenned, Realistic Architectural Rendering with 3ds max and mental Ray is coming out. Publication date is listed on most major websites as April 15, 2007. I had my hands on an author copy this week but gave it up to the people at Autodesk M&E in Montreal, to show around. Alas, I can't post a picture of the book.
I really like how it has turned out, looks fantastic in full color. plenty of images take advantage of that fact. If you want to see how it looks try amazon's site and do a search on "Roger Cusson". Prices seem to vary a bit from one online retailer to another, so shop around.
cheers
I really like how it has turned out, looks fantastic in full color. plenty of images take advantage of that fact. If you want to see how it looks try amazon's site and do a search on "Roger Cusson". Prices seem to vary a bit from one online retailer to another, so shop around.
cheers
Thursday, March 29, 2007
Computer Spaghetti - Rant #2
 This week I had the unfortunate mispleasure to have to do some work on my computer hardware. Nothing major, heck I did not even have to open up the box. Just try to find a few devices plugged into various ports. What did I find? Computer spagehetti..!!! The most jumbelled mass of computer wires I have ever seen in my 20 year career in this industry.
Ok back to the simplicity rant, it used to fairly simple. Power cord, keyboard, mouse, printer, printer power, video cable and video power cable.. that's 7 right..? Wow look at this current mess, and everything seems to need a power cable in itself. I ran out of USB ports in the back of the computer so I had to get a USB Hub, also needs a power source...wires upon cables.... eee gads... and sometimes the USB hub power connector gets loose and the whole hub and all devices that are connected to it become unavailable. Ugh... Someone Help...
Friday, February 09, 2007
Simplicity - Rant #1
Well, I'm going to try to stay positive here, because that is a good thing.
Over the last few months, I thought about adding some of my opinions to this site rather than only a few tutorials and pics. So here goes, Rant #1, it's target, Simplicity.
Let's start with a question. There is all this technology in your life today, much more than say 10 years ago, but, is your life simplier now than before?
Is your answer no..? Wasn't the promise of technology to make life simplier for us..? I seem to remember that promise.... Do you remember the term "User Friendly", man we are so far from that concept that nobody even uses that term any more. How can a computer be user friendly when I still have to climb under my desk almost everyday to hook up and disconnect something.
So what went wrong? IMHO many things; feature bloat, awful user interfaces, lack of effective training, and acronymns...:-).... It's like learning a new language... IMHO (In my humble opinion)..Aie.... People, really, let's say once and for all, humans use their computers generally above on top of their desk.
I think everyone can come up with examples of something they simply hate and something they can't live without. For example, I almost dread opening a new gadget these days because I know what's coming, "The Manual". You know when you get down to it, do you think there is something wrong when I have to read a manual to make a phone call..? I have a 200 page manual in my car, but when I picked it up at the dealer, they took 2 minutes to show me a couple of things different about the car and away I went... Only cracked the manual when I had to change the clock for the radio / DVD player (Don't get me started..)
I have to admit though, There are things I can't live without, such as spell check and Google. I could not do my job without spell check. I don't know how I would find answers to things so quickly without a search engine like Google. When I think about it I could probably do without these things but they sure would take a whole lot longer.
Seems to me that we could make our gadgets work in a simple fashion, Spell check is simple, Google is simple, Switching from one car to another is normally simple. Why can't cell phones, digital cameras, and the holy grail of simplicity - computer hardware and software -- be simple.
Just the other day, I picked up my son's iPod, and played back some music, navigated, turned it on and off, all in a few minutes, no frustration, no manual. WOW.
Over the last few months, I thought about adding some of my opinions to this site rather than only a few tutorials and pics. So here goes, Rant #1, it's target, Simplicity.
Let's start with a question. There is all this technology in your life today, much more than say 10 years ago, but, is your life simplier now than before?
Is your answer no..? Wasn't the promise of technology to make life simplier for us..? I seem to remember that promise.... Do you remember the term "User Friendly", man we are so far from that concept that nobody even uses that term any more. How can a computer be user friendly when I still have to climb under my desk almost everyday to hook up and disconnect something.
So what went wrong? IMHO many things; feature bloat, awful user interfaces, lack of effective training, and acronymns...:-).... It's like learning a new language... IMHO (In my humble opinion)..Aie.... People, really, let's say once and for all, humans use their computers generally above on top of their desk.
I think everyone can come up with examples of something they simply hate and something they can't live without. For example, I almost dread opening a new gadget these days because I know what's coming, "The Manual". You know when you get down to it, do you think there is something wrong when I have to read a manual to make a phone call..? I have a 200 page manual in my car, but when I picked it up at the dealer, they took 2 minutes to show me a couple of things different about the car and away I went... Only cracked the manual when I had to change the clock for the radio / DVD player (Don't get me started..)
I have to admit though, There are things I can't live without, such as spell check and Google. I could not do my job without spell check. I don't know how I would find answers to things so quickly without a search engine like Google. When I think about it I could probably do without these things but they sure would take a whole lot longer.
Seems to me that we could make our gadgets work in a simple fashion, Spell check is simple, Google is simple, Switching from one car to another is normally simple. Why can't cell phones, digital cameras, and the holy grail of simplicity - computer hardware and software -- be simple.
Just the other day, I picked up my son's iPod, and played back some music, navigated, turned it on and off, all in a few minutes, no frustration, no manual. WOW.
Saturday, December 09, 2006
New Images from Upcoming book

Just wanted to post a couple of images which are up and coming from a book which I am working on with a 3ds max artist in England. Jamie Cardoso is a phenomenial 3D Artist who has used 3ds max and Mental Ray for a long time. His work is so exceptional that Autodesk hired him to contribute his images, and know how, so a book like this could be created.
More Information on the book can be found at:
http://books.elsevier.com/us/focalbooks/us/subindex.asp?isbn=0240809122&country=United+States&community=focalbooks&ref=&mscssid=HLWWVGB00PCQ9K3XB3W98GRGMQDL22N5
Tuesday, November 07, 2006
Photos from NYC
This summer I visited New York and took a few architectural photos. I thought I'd share them with a few comments.

Ground breaking architecture during my formative years learning architecture at McGill. Phillip Johnson designed it. started a movement called post modernism. Building was originally comissionedand occupied by AT&T.
Chrysler building lobby, unfortunately this is as far as you can go. No access to the upper floors.

Ground breaking architecture during my formative years learning architecture at McGill. Phillip Johnson designed it. started a movement called post modernism. Building was originally comissionedand occupied by AT&T.
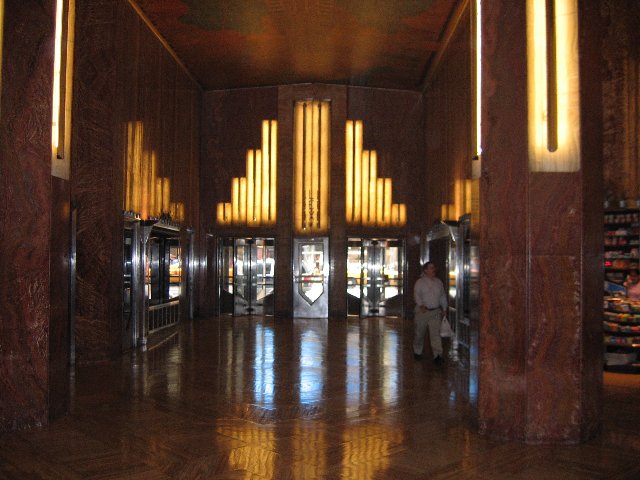
Chrysler building lobby, unfortunately this is as far as you can go. No access to the upper floors.


Rockfeller Center plaza, great place to chill on a hot summer afternoon. The Rock as it has been labeled has a new vocation as an observation deck. Much less crowded than the Empire state bldg. You can see the empire state building from the Rock's deck....

.
.
.
.
.
.
.
.
.
Bit of a hazy day, but the Empire State Building in all it's glory.
Thursday, October 12, 2006
Recent Images

This image was created to work on a landscape in front of a building. The building itself did not get much attention. A bionautics tree was used in the foreground, and mental ray's Arch + Design material for the water. (October 2006)

This TV unit was done for a local furniture manufacturer. the wood was of particular interest to the company. pictures of the actual wood grain were incorporated into the Arch + Design material in mental ray. (September 2006)
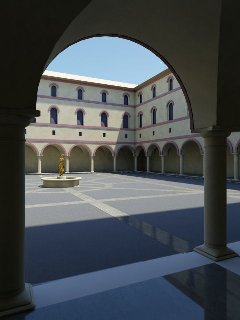
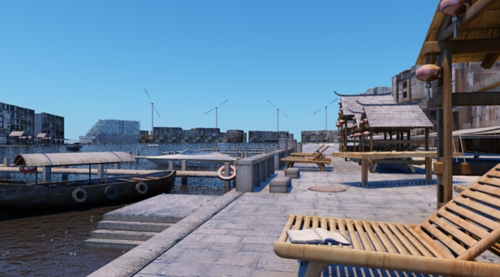
This image was created for Autodesk's 3ds max 9 essentials courseware to show an introduction to the new mental ray Implementation in max 9. (August 2006)

Photocomposite image created in 3ds max 8 (Summer 2005)
Sunday, June 04, 2006
Vertical Compound Walls - Revit
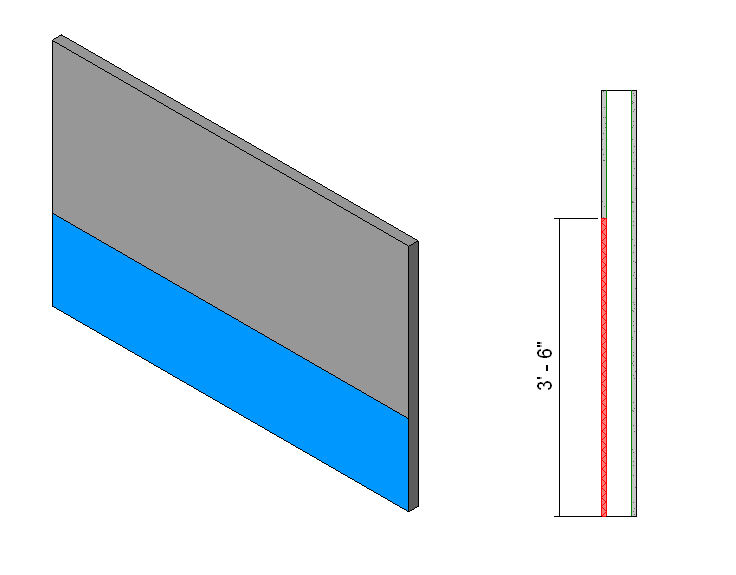
Changing Wall Materials Vertically.
I decided to write out the following simple exercise because I found it difficult through much of the documentation to figure out how to create a wall which changed from one material to another vertically. There appears to be 3 different methods of creating walls which change materials vertically. Example 1: a fairly simple transition where the wall profile and thickness does not change. For example a bathroom wall which has tiles to about 3’6” (1050 mm) then the remainder of the way gypsum board.
1/ Create a new project in Revit using the default.rte imperial or metric template file.
2/ Select the Wall Tool in the Design Bar.
3/ Select the Properties Button on the options bar.
4/ In the Element Properties Type List Select the Interior – 4-7/8” (138mm) partition (1-Hr.) wall.
5/ Click Edit New.
6/ Click Duplicate.
7/ In the Name Dialog Enter, Interior - Bathroom Partition.
8/ Click on the Edit button next to the Structure parameter.
9/ Click on the Preview button in the lower left of the Edit Assembly dialog.
10/ In the view pull down list, Select: Section: Modify type attribute.
11/ Change the Sample Height to 5’-0” (1525mm).
12/ Right Click in the Sample area and Select Zoom to Fit.
13/ Select the first row (#1) of the Layers of the wall.
14/ Click on the Split Region button in the Modify Vertical Structure area.
15/ Click in the section view on the highlighted side of the wall. Approximately 3’-6” (1050mm) from the bottom.
16/ Click on Row number 1 in the Layers area.
17/ Click on the Insert Button.
18/ Change the Function of the new row to Finish 2 [5].
19/ Change the Material to: Finishes – Interior – Tile.
20/ Change the Shading color of the Interior Tile material to blue.
21/ Click the Assign Layers button in the Modify Vertical Structure area.
22/ Click on the lower section of the region you split earlier. The New Tile Material is assigned to this area.
23/ Click Ok until you exit all dialogs.
24/ Draw a Wall Using this new wall structure and view it in a 3D view.
25/ Set the shading mode to Shading with Edges The blue shaded area is the area is the area with the tile finish.
Subscribe to:
Posts (Atom)